Baking with a sourdough starter can be an incredibly rewarding experience. But what do you do if your starter isn’t floating?
You may be tempted to give up, but don’t! There are a few tricks you can try to get your starter back on track.
Let’s explore some of the reasons why your starter might not be floating and what you can do about it.
Contents
Why Is My Sourdough Starter Not Floating?
Here are some reasons why your sourdough starter might not be floating:
1. Too Much Flour
If your starter is not floating, the first thing to check is whether you have added too much flour. Your sourdough needs a ratio of roughly one part flour to two parts water in order for it to float properly.
If there is too much flour in relation to the amount of water, the mixture will become too dense, which prevents it from floating.
To fix this problem, simply add more warm water until the ratio is correct.
2. Not Enough Time
Another possible reason why your starter isn’t floating is that it hasn’t had enough time to develop. It typically takes three days for a sourdough starter to reach its optimal level of activity and palatability.
If you try to use it before then, it won’t float properly and could produce unsatisfactory results when baking with it.
To ensure that your starter has had enough time to rise, let it sit in a warm place for at least three days before using it (or longer if needed).
3. Insufficient Yeast Activity
Finally, if your starter still isn’t floating after three days, then there may not be enough yeast activity occurring inside the mixture yet.
To increase yeast activity and make sure that your sourdough has enough gas bubbles in order for it to float correctly, try adding some extra sugar or honey when preparing the dough or feeding the starter each day.
This should help jumpstart the fermentation process and allow more gas bubbles to form within the mixture so that it can eventually float properly when ready for use.
How Do I Get My Sourdough Starter to Float?
Let’s take a look at the process.
1. Hydration Level
The first step in getting your sourdough starter to float is ensuring that it has enough hydration.
To check the hydration level of your starter, simply grab a spoonful and drop it into a cup of water.
If the starter floats, then the hydration level is good; if it sinks, however, then the hydration needs to be increased.
To increase the hydration level, add more water and mix until it reaches the desired consistency.
2. Feeding Your Starter
Once you have reached an adequate hydration level for your starter, you need to feed it regularly in order to keep it active and alive.
Feeding involves adding equal parts flour and water (by weight) every 12-24 hours and mixing until fully incorporated.
It’s important not to overfeed as this can lead to too much growth in the starter which can cause problems when making bread later on down the line.
3. Temperature
In order for your sourdough starter to float, you need to provide it with an environment that encourages activity.
The ideal temperature for a sourdough starter is between 70-80 degrees Fahrenheit; temperatures lower than this will slow down activity while temperatures higher than this can kill off beneficial microorganisms in your starter.
It’s also important not to expose your starter to direct sunlight or extreme fluctuations in temperature as this can also damage or kill off beneficial microorganisms.
How Long Does a Sourdough Starter Have to Float?
Once you have ensured that your starter has enough hydration, is being fed regularly, and is kept at the correct temperature, it should start to float within 12-24 hours.
If it still hasn’t floated after this time period, however, then something could be wrong with your starter, and you may need to discard it and begin again.
What if Your Starter Sinks and Then Floats?
If your starter sinks and then floats, it could be an indicator of too much flour in the mixture.
To fix this problem, simply add more warm water until the ratio is correct and your starter will float properly.
What Effects How Well a Sourdough Starter Floats?
1. Factors That Determine Floating Ability
The ability of a sourdough starter to float in water depends on several factors including age, hydration level, sugar content, and acidity levels. The older your sourdough starter is, the more likely it is to be able to float in water because older starters are typically more acidic than younger starters.
Additionally, starters with higher levels of sugar tend to be better able to float because sugar helps create buoyancy in the mixture.
Finally, a properly hydrated starter has more gas bubbles which help provide buoyancy as well.
Generally speaking though, any healthy sourdough starter should be able to float in the water with ease!
2. Using the Float Test
The float test is an easy-to-use method for determining the health and vitality of your sourdough starter.
To perform the float test, simply scoop some starter out of your jar or container, drop it into a bowl of room temperature water, and observe whether or not it sinks or floats.
If it sinks, then this indicates that your starter is not yet active enough to be used for baking.
However, if it floats then this indicates that your starter is healthy and ready to use!
Using the float test can help you determine if your sourdough starter needs more time before you can use it for baking. Ideally, you want your starter to consistently rise within 8-12 hours after feeding so that it’s ready for baking when you need it!
The float test can help you determine if your starter needs more time or if it’s ready for action!
How to Know When Your Starter Is Ready to Use?
When it comes to testing whether or not your starter is ready for use there are three main indicators that you should look for: smell, texture, and bubbles.
1. Let’s Start With The Smell:
When your sourdough starter smells like a mixture of cheese and beer, it’s ready for use. It will also have a slightly sweet taste which can help you determine if it’s ready as well.
2. Next Is The Texture:
It should be thick but not too thick so that it looks like a paste-like consistency.
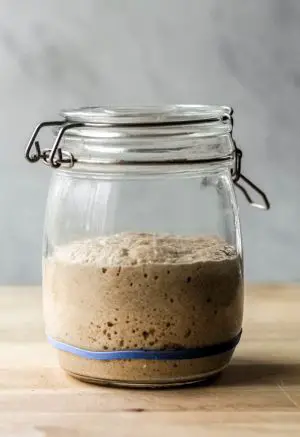
3. Finally, bubbles!
When your starter has visible bubbles on top after feeding, this is an indication that the fermentation process was successful and therefore it is ready to be used in recipes.
It may take some trial and error before you find the right combination of smell, texture, and bubbles but once you do, your sourdough baking journey will begin!
Extra Tip:
Another helpful tip is to add more flour or water to adjust the consistency of your starter – if it’s too thin then add more flour; if it’s too thick then add more water until it reaches a paste-like consistency.
This will ensure that when it comes time to bake with your sourdough starter, everything will turn out just right!
Conclusion:
Baking with sourdough doesn’t have to be complicated or intimidating—all you need is patience and practice!
Floating or not floating—that is often the question when troubleshooting a sourdough recipe!
While having a non-floating sourdough starter can seem like an insurmountable obstacle at first glance, there are actually several easy fixes like adding more water or sugar/honey to get it back on track again quickly and easily.
With patience and practice, you’ll soon be able to whip up delicious homemade bread with ease!
Amazon and the Amazon logo are trademarks of Amazon.com, Inc, or its affiliates.
